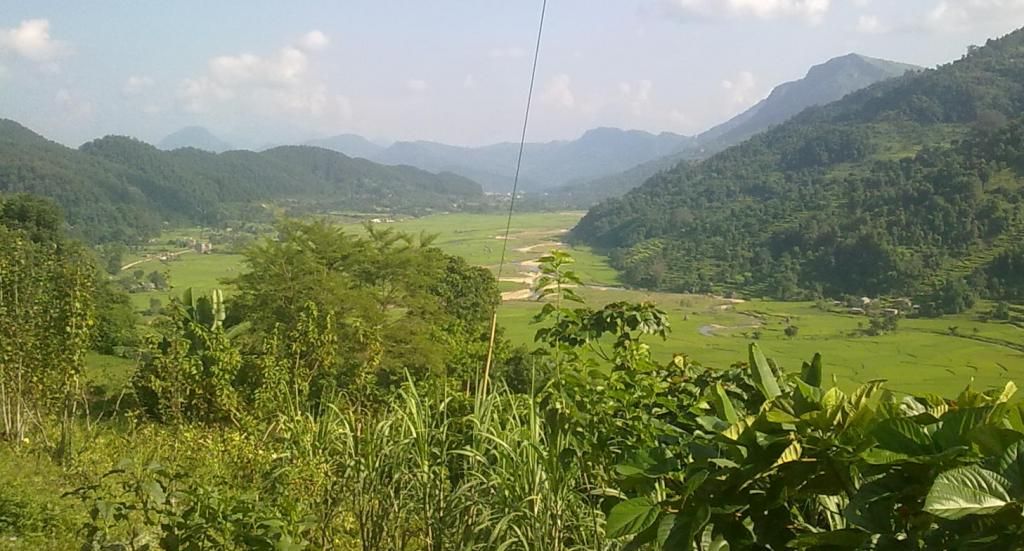
The Place Where I Belong:Sange,Tanahun
I Love Showcasing My Talents, Not Only To My Hometown Fans And My Own Team But To My World....[Manapang VDC Ward no 8:Sange,TANAHUN]
EMINEM-My Hero
Eminem is king of rap in the rap field. His top album 'Recovery(2010)' is one of the boost and famous album in the world.The album 'MMLP2(2013)' is also a latest album of Eminem.His fan page(facebook) gets world's top like records.

हरिबंश आचार्य
चिना हरायको मान्छेले धेरै चोटी हसाउनु को साथ साथै सुक सुक गर्न बाद्य बनायो एक चोटी सबै ले पड्नु पर्ने किताब. क्रान्तिकारी स्वभाव को मान्छे जति पनि कठोर देखिन्छ उसको मन सबै भन्दा नरम र कोमल हुन्छ, यो मेरो अनुभव र यो किताब पडीसक्या पछि झन् पक्का भयो......

Institute Of Engineering: Western Region Campus
Paschimanchal Campus (WRC) is situated in the northern part of mega-scenic Pokhara valley. The initiation of the Paschimanchal Campus (WRC) in pokhara under the institute of Engineering (IOE),Tribhuvan University can be considered as a revolutionary step towards meeting the demand of technical manpower in the field of engineering for the development of the nation.

Electronics And Communication Engineering
The communications industry offers wired, wireless and satellite services using such devices as wired phone and cable TV, as well as cellular phone, broadband and mobile Internet, and satellite TV, among others. Fast data transmission is used by many businesses, households and individuals. The industry continues to evolve. The United States is the world's largest broadband market, with more than 83.3 million fixed (wired) broadband subscriptions and 136.6 million wireless broadband subscriptions.

Monday, November 25, 2013
Saturday, November 23, 2013
 6:24 PM
 Unknown
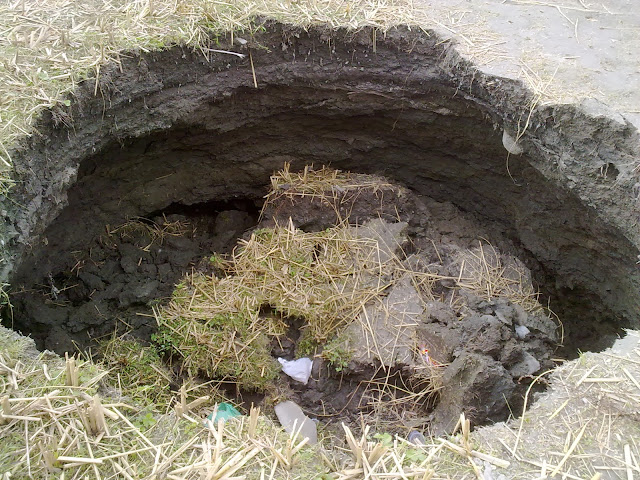
तीन संरचनामा रहेको पोखरा उपत्यका ग्रावेलले पुरिएको र ग्रावेल युक्त कङकी्रटलाई चुनयुक्त पदार्थको मिसावटले बाँधेको भूगर्भशास्त्री के. सी. बताउनुहुन्छ ।
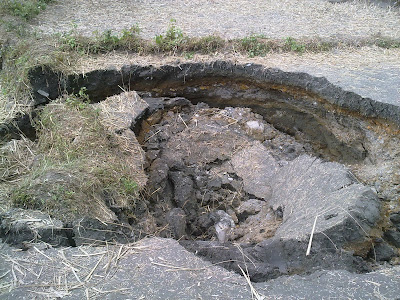
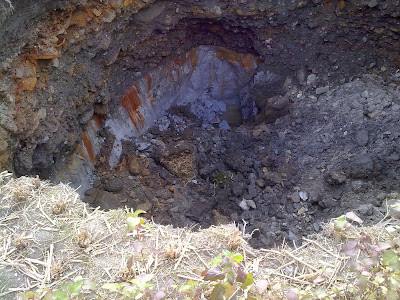
चुनयुक्त पदार्थ कङकि्रटमा टाँिसएर रहे पनि त्यस स्थानमा पानी परेपछि चुन पग्लिने र चुन भएको ठाउँमा ससाना प्वाल पर्ने गर्दछ । निरन्तर चुनयुक्त पदार्थ पानीमा घोलिएपछि त्यस स्थानमा प्वालहरु ठूला पर्ने गर्दछन्। जमिन भाँसिनुको कारण यही हो ।

Phewa Lake and Machhapuchhre (Mt. Fish Tail). Photo courtesy: horizonkshitij.blogspot.com
पोखरा उपत्यकाको भूगर्भभित्र पनि चुन पग्लिएर बनेका यस्ता थुप्रै ठूलाठूला खाली भागहरु रहेका छन् । सतहमा बनाइने ठूला भवनहरु र बेला बेलामा जाने भूकम्पले सो स्थानको जमिन भासिने गर्दछ । पोखरामा सम्वेदनशील रहेका यस्ता क्षेत्रहरुमा रंगशालाको दक्षिण भाग, एसओएस क्षेत्र, रातो पैह्रो, हरियाखर्कको सेती नदीका पूर्वी भाग रहेका छन् ।
यसै क्षेत्रका पश्चिमी भाग पनि जोखिममा रहेको सन् २००० मा जर्मनीको एक संस्था र नेपालस्थित खानी तथा भूगर्भ विभागले तयार पारेको नक्सा जियोलोजिकल म्यापमा पनि देख्न सकिन्छ । उक्त नक्सामा पोखरा उपमहानगरपालिकाका अन्य जोखिम क्षेत्रहरु पनि समेटिएका छन् जसमा विरौटादेखि पश्चिम छोरेपाटन र पार्दी खोलाको वरपरको भाग रहेको छ ।
यी बाहेक नदीपुर, न्यूरोड ढाँड जनप्रिय क्याम्पस र फिर्के वरपरको भाग पनि जोखिममा रहेका क्षेत्र हुन् । यी स्थानलाई जियोलोजिकल म्यापले पनि सम्वेदनशील क्षेत्र भनी जोखिमको सूचिमा राखिसकेको छ ।
पोखरा उपत्यकाको संरचना नै बलौटे माटो र पत्थरको संरचनाले बनेको हुँदा चुनयुक्त पदार्थमा पानी परेपछि चुन पग्लने र प्वाल पर्दै जाने हुँदा घना बस्ती र सानै रेक्टर स्केलको भूकम्पले पनि ठूलो क्षति पुग्ने भूगोलविद् तथा पृथ्वीनारायण क्याम्पस भूगोल विभागका सहप्राध्यापक डा. केदार बस्नेतको भनाइ छ । आवास र औद्योगिक निर्माणले कमजोर भूसतह भएको स्थानमा भार पर्ने, यस्ता निर्माणहरु बनिसकेपछि नाला पानी काट्ने ठाउँ र बलेनीको निकास राम्रोसँग खुल्न नसक्दा सो पानीले भूगर्भको चुन पगाल्ने र सो स्थानमा भासिने बस्नेतले बताउनुभयो ।
अहिले सेती नदी बाढी आउनुपूर्वको १० हजार वर्ष पहिलेको स्थिति सतहमा पुगिसकेको र अब त्यसभन्दा बढी नगहिरिने भूगर्भशास्त्रीहरुको धारणा छ । भाँसिने ठाउँका बारेमा र भूकम्पबाट हुने जनधनको क्षति न्यूनिकरणका लागि बच्न जियोलोजिकल म्यापले छुट्याएका सम्वेदनशील क्षेत्रहरुमा निर्माण कार्य गर्दा सावधानी अपनाउनुपर्ने डा. के.सी. र बस्नेतको सुझाव छ।
पोखरा उपत्यकामा बनेका तालहरु पनि सेतीमा आएको बाढीकै कारण सेती नदीका सहायक खोलाहरुको मुख थुनिएर निर्माण भएको भूगर्भशास्त्रीको भनाइ छ । त्यसरी बाढीले शाखा खोलाहरुको मुख थुन्दा बन्न पुगेका तालहरु पोखरा भित्र नौ वटा रहेका छन् । ती मध्ये दोभान खोला थुनिएर रुपा, स्याङखुदी थुनिएर बेगनास, हर्पन खोला थुनिएर बेगनास लगायतका तालहरु बनेको भूगर्भ शास्त्रीहरु बताउँछन् ।
Tuesday, November 19, 2013
 7:17 PM
 Unknown
We all know that a every Facebook profile will have a unique numerical ID like
www.facebook.com/220888831260608 but after assigning your own User Name numeric id
will not show in your profile url, it redirects to your custom User Name. one of our blog reader
asked this doubt. Here is the trick to get your facebook id number using facebook graph.
Non-Customized Facebook Profile URL
Your URL (web address) will look something like this:
https://www.facebook.com/profile.php?id=100001481979175
Customized Facebook Profile URL
Here’s what I mean by a customized Facebook profile URL – I’ll use my Facebook profile as the example:
https://www.facebook.com/kshitij.wagle.3
Here’s how to find your Facebook ID
~*~ kshitij's FACEBOOK USER ID FINDER tool ~*~
Just Enter your Facebook User Name and Click on '"Get Details".After Click on "Get Details", Its pop up a window, which having all details of your page or profile.
Like the below snapshot
{
   "id": "100001481979175",
   "name": "Kshitij Wagle",
   "first_name": "Kshitij",
   "last_name": "Wagle",
   "link": "http://www.facebook.com/kshitij.wagle.3",
   "username": "kshitij.wagle.3",
   "gender": "male",
   "locale": "en_GB"
}
 7:00 PM
 Unknown
Most of you are spending precious time creating unique article for your readers and when someone comes and copies your hard work without permission and also not giving you credit by creating backlinks to its original post, it actually feels bad.
You need a backlink to credit all of your hard work and I have here ways on how to get backlinks when someone copies your content.
This will work on blogger and wordpress. Here are the simple steps
1. Go to your blogger.com account.
2. Click Layout > Add gadget> select HTML/ javascript
3. Copy and paste the code below
<script type='text/javascript'>function addLink(){var a=document.getElementsByTagName("body")[0];var b;b=window.getSelection();var c="<br/><br/> Source : <a href='"+document.location.href+"'>"+document.location.href+"</a><br/>Content Copyrighted to Kshitij Wagle";var d=b+c;var e=document.createElement("div");e.style.position="absolute";e.style.left="-99999px";a.appendChild(e);e.innerHTML=d;b.selectAllChildren(e);window.setTimeout(function(){a.removeChild(e)},0)}document.oncopy=addLink
</script>
4. Just edit the code colored in blue as you like. Save your gadget and you are all done.
When someone copies your article an attribution link will automatically appear. giving you a backlink to your site.
Try it for yourself, copy an article from your blog and paste it, you will see a source line below of that copied text.
+Kshitij Wagle
 6:58 PM
 Unknown
When you are going to click a label for your blog you will see this message above "showing posts with label posts. Show all posts". For some, like me, I don't like that appearing on my blog. It is useless and annoying, so many people want it removed.

If you want it removed, here is the tricks that will remove that "showing posts with label" for blogger.
Step 1.
Go to blogger dashboard > Edit HTML > Click on expand template (make a back just in case).
Step 2.
Use CTRL+F and find this code in the template.
<b:includable id='status-message'>
<b:if cond='data:navMessage'>
<div class='status-msg-wrap'>
<div class='status-msg-body'>
<data:navMessage/>
</div>
<div class='status-msg-border'>
<div class='status-msg-bg'>
<div class='status-msg-hidden'><data:navMessage/></div>
</div>
</div>
</div>
<div style='clear: both;'/>
</b:if>
</b:includable>
Step 3.
After you find it, delete the code above and replace it with this one.
<b:includable id='status-message'>
<b:if cond='data:navMessage'>
<div>
</div>
<div style='clear: both;'/>
</b:if>
</b:includable>
Save template and that is all.

<b:if cond='data:navMessage'>
<div class='status-msg-wrap'>
<div class='status-msg-body'>
<data:navMessage/>
</div>
<div class='status-msg-border'>
<div class='status-msg-bg'>
<div class='status-msg-hidden'><data:navMessage/></div>
</div>
</div>
</div>
<div style='clear: both;'/>
</b:if>
</b:includable>
<b:if cond='data:navMessage'>
<div>
</div>
<div style='clear: both;'/>
</b:if>
</b:includable>
 6:56 PM
 Unknown
 Aloha! today I will share to you some Adsense techniques that will help you earn more money. One of the best way to put your Adsense ads is putting it below post titles, but in this lesson we will add more, we add "add this" social sharing widget next to your Adsense ads. I found this trick on www.abctrick.net.
Before we begin the installation, I need you to go to your Adsense account and create a new 300x250 blocks ads that will perfectly blend with your template. After creating your new ads, save and get code, then copy and paste the code on this HTML parser.
Installation
/* Adsense below post title with Addthis and Social Badges by abctrick.net */ .boxround { margin : 0 auto; padding : 10px;border : 1px solid #ccc; -moz-border-radius-topright:10px; -moz-border-radius-bottomleft:10px; -webkit-border-top-right-radius:10px; -webkit-border-bottom-left-radius:10px; border-radius-topright:10px; border-radius-bottomleft:10px; } #addthis-left { float : left; } .addthis_toolbox .vertical { float : left; width : 215px; padding-left : 5px; min-height : 185px; position : relative; } .addthis_toolbox .vertical a { position : relative; display : block; width : 150px; padding : 4px 0 4px 34px; text-decoration : none; color : #626262; transition: color .2s ease-in-out; -moz-transition: color .2s ease-in-out; -webkit-transition: color .2s ease-in-out; -o-transition: color .2s ease-in-out; } .addthis_toolbox .vertical a:hover { color : #8f8f8f; text-decoration : none; border-radius: 4px; -moz-border-radius: 4px; -webkit-border-radius: 4px; } .addthis_toolbox .vertical1 { float : left; width : 215px; min-height : 185px; position : relative; } .addthis_toolbox .vertical1 a { position : relative; display : block; width : 150px; padding : 4px 0 4px 15px; text-decoration : none; color : #626262; transition: color .2s ease-in-out; -moz-transition: color .2s ease-in-out; -webkit-transition: color .2s ease-in-out; -o-transition: color .2s ease-in-out; } .addthis_toolbox .vertical1 a:hover { color : #8f8f8f; text-decoration : none; border-radius: 4px; -moz-border-radius: 4px; -webkit-border-radius: 4px; } .addthis_toolbox .vertical1 .more { border-top : 1px solid #eee; padding : 2px 0 0 0; margin : 10px 10px 0 10px; text-align : center; } .addthis_toolbox .vertical span { position : absolute; left : 14px; top : 4px; } .addthis_toolbox .vertical .more { border-top : 1px solid #eee; padding : 2px 0 0 0; margin : 10px 10px 0 10px; text-align : center; } .addthis_toolbox .vertical .more a { padding : 0 0; margin : 0; } .addthis_toolbox .vertical .more a:hover { background : none; } .addthis_toolbox .vertical .more span { display : none; } .googleplus { padding-left : 15px; padding-top : 5px; padding-bottom : 3px; display : inline-block;
3. Now, we will put jQuerry script as well as Google + and Twitter script on the template. Find the</head> tag and put the codes above it.
<!-- Addthis jQuery - Remove if you already have this --> <script src='http://s7.addthis.com/js/250/addthis_widget.js' type='text/javascript'></script> <!-- Twitter Button jQuery - Remove if you already have this --> <script src='http://platform.twitter.com/widgets.js' type='text/javascript'></script> <!-- Google +1 Button jQuery - Remove if you already have this --> <script src='https://apis.google.com/js/plusone.js' type='text/javascript'>{lang: 'en'}</script>
4. Find this tag <div class='post-header-line-1'/> or <data:post.body/> and paste the codes below above it.
<!-- Adsense below post title with Addthis and Social Badges by abctrick.net Starts --> <b:if cond='data:blog.pageType == "item"'><!-- Remove --> <div class='boxround'> <table border='0' cellpadding='0' cellspacing='0' width='98%'> <tr> <td width='330'>REPLACE THIS LINE WITH CONVERTED ADSENSE CODE </td> <td><div class='boxround-right-min'> <div class='addthis_toolbox'> <div class='vertical'> <div class='googleplus'> <g:plusone annotation='bubble' size='medium'/> <iframe allowTransparency='true' expr:src='"http://www.facebook.com/plugins/like.php?href=" + data:post.url + "&send=false&layout=button_count&show_faces=false&width=90&action=like&font=arial&colorscheme=light&height=21"' frameborder='0' scrolling='no' style='border:none; overflow:hidden; width:90px; height:21px;'/> <br/> <a class='twitter-share-button' data-lang='en' href='https://twitter.com/share'>Tweet</a><br/> <a class='twitter-follow-button' data-lang='en' data-show-count='true' href='https://twitter.com/YOUR_TWITTER_USERNAME'>Follow @YOUR_TWITTER_USERNAME</a> </div> <a href='YOUR_GOOGLE_PLUS_URL' style='text-decoration:none; background-color:transparent!important; margin-left:-20px!important' target='_blank'><img alt='Adsense besides Add this sharing social widget below post title for blogger' src='https://ssl.gstatic.com/images/icons/gplus-16.png' style='border-right-width: 0px; border-top-width: 0px; border-bottom-width: 0px; vertical-align: middle; border-left-width: 0px;'/> Follow On Google+</a> <a class='addthis_button_facebook'>Share On Facebook</a> <a class='addthis_button_stumbleupon'>Stumble This Post</a> <a class='addthis_button_reddit'>Submit On Reddit</a> <a class='addthis_button_email'>Email To A Friend</a> <div class='more'> <a class='addthis_button_expanded'>More Destinations</a> </div> </div> </div> </div></td> </tr> </table> </div> </b:if> <!-- Remove --> <!-- Adsense below post title with Addthis and Social Badges by abctrick.net Ends -->
- *Replace "REPLACE THIS LINE WITH CONVERTED ADSENSE CODE" with your parsed Adsense code. Remember to parse it first before putting it there.
- *Replace "YOUR_TWITTER_USERNAME" with your twitter username.
- *Replace "YOUR_GOOGLE_PLUS_URL" with your complete Google + profile URL.
 6:54 PM
 Unknown
| Post-Code: code converter | ||||
| ||||
3. Click on convert.
4. Go to your blogger dashboard > edit template > tick on expand widgets
5. Find this code using CTRL+F <data:post.body/> (Note: some templates has more than 1 of this code, just try them all in case it doesn't work)
6. Just above it paste this code
<b:if cond="data:blog.pageType == "item"">
<div style="float: left; padding: 5px; margin: 5px;">
PARSED ADSENSE CODE
</div>
</b:if>
7. Replace " PARSED ADSENSE CODE " with your own parsed adsense code.
Save template!
Note
 RSS Feed
 Twitter